Outdoor Kitchens and Fire Pits: What to Know Before You Build in Idaho
The most beautiful outdoor living spaces in the Treasure Valley share one thing in common: they were designed as a system, not assembled piece by piece. Here’s how to think about hardscape, fire features, and outdoor kitchens as a cohesive whole — before a single shovel hits the ground.
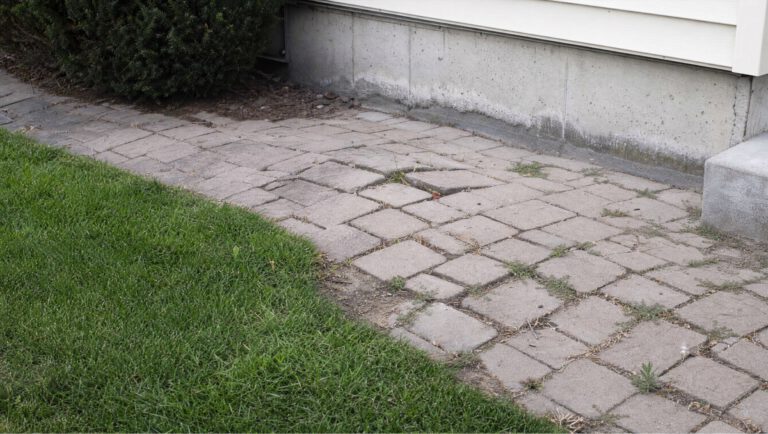
There’s a version of an outdoor living project that goes like this: patio this year, fire pit added two summers later, outdoor kitchen eventually. Each piece looks fine on its own, but the result is an outdoor space that feels disconnected — zones that don’t relate to each other, traffic flow that doesn’t work, and a layout that was never quite designed for the life you’re actually trying to live outside. After 20 years of building premium hardscape across Boise, Meridian, Eagle, Nampa, and the greater Treasure Valley, the most common regret we hear from homeowners isn’t about the quality of what was built. It’s that they didn’t plan the full picture before they started.
This guide covers how to approach the integration of pavers, fire features, and outdoor kitchens as a unified outdoor living environment — so that whatever you build first serves the vision you have for the whole.
Start with How You Actually Live Outside
Before you think about materials, layouts, or features, start with the question of how you actually use — or want to use — your outdoor space. This sounds obvious, but it’s where the most meaningful design decisions get made.
A family that hosts large gatherings needs a different layout than one that primarily entertains small groups. A household with young children needs to think about sightlines from the kitchen, surface safety around fire features, and durability under heavy play traffic. A couple who wants a quiet, private retreat has completely different priorities from one who wants an outdoor entertainment hub.
The features you choose — a fire pit, a fireplace, a full outdoor kitchen versus a simple grill station — and how they’re positioned relative to each other and to the house, should all flow from this starting point. Your outdoor space should be built for the life you live, not the life a showroom floor suggests.
How Pavers Tie Everything Together
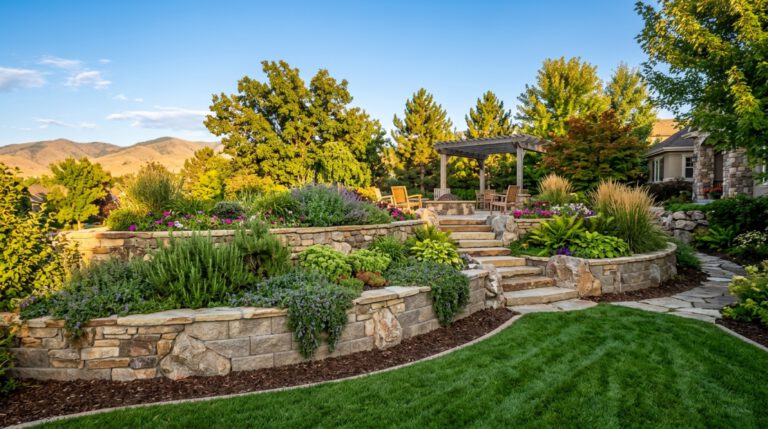
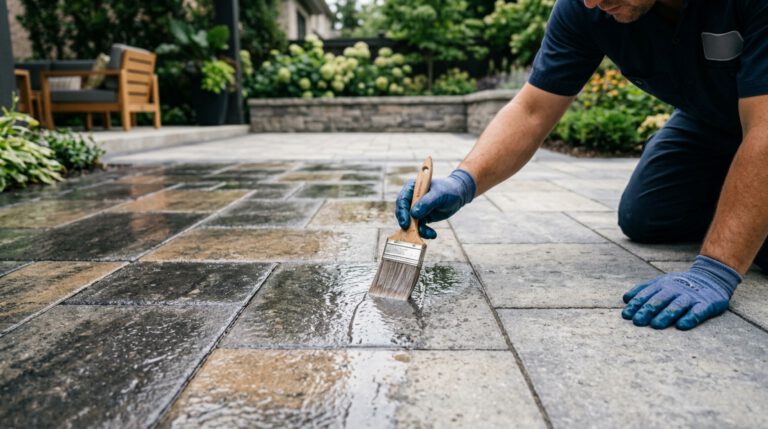
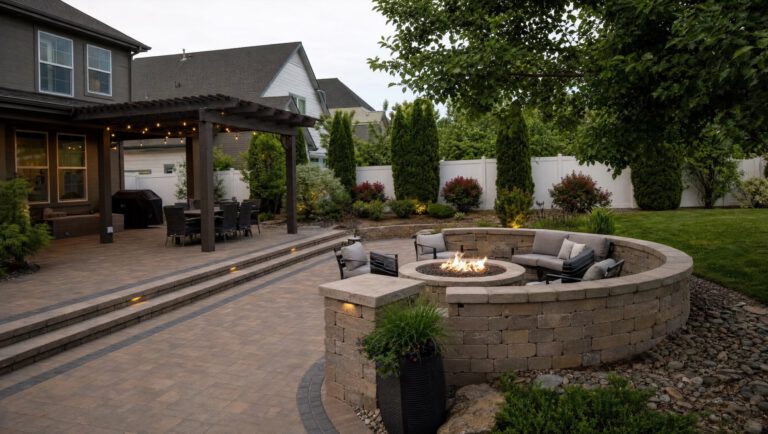
In an integrated outdoor living space, the paver system does more than provide the floor. It defines zones, creates transitions between areas, establishes the visual language of the entire environment, and — critically — determines traffic flow.
Zone definition. Different areas of a well-designed outdoor space often benefit from subtle distinctions — a change in paver pattern, a border detail, or a transition in material that signals “this is the dining area” versus “this is the lounge” without walls or fences. Thoughtful paver design can create that sense of place while maintaining visual continuity across the entire space.
Traffic flow. The way people move through an outdoor space is determined largely by where the pavers lead. If the path from the back door to the outdoor kitchen runs directly through the conversation area around the fire pit, that’s a problem you’ll feel every time you host. Good hardscape design anticipates these movement patterns and builds them into the layout.
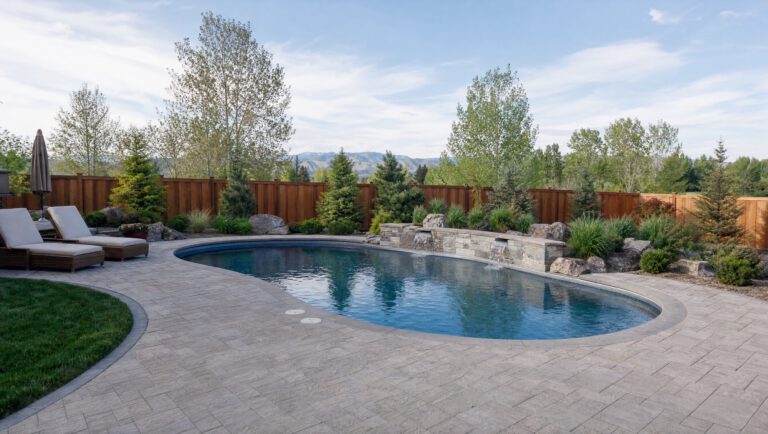
Heat and safety buffer zones. Fire features — whether a gas fire pit or a wood-burning fireplace — require clearances from structures, overhangs, and flammable materials. The paver layout should create natural buffer zones that satisfy these requirements without making the fire feature feel isolated. A fire pit dropped into the middle of a continuous paver field without clear separation from the seating surround, the grill area, and the house isn’t safe — or comfortable.
Drainage continuity. An outdoor kitchen adds a significant water source to the equation — dishwashing, prep work, and beverage service all produce runoff. The drainage design for the paver system needs to account for this, as does the drainage at the base of any outdoor sink or dishwasher. This is a detail that’s easy to address during design and difficult to fix after the fact.
Designing Around a Fire Feature
Fire pits and outdoor fireplaces are among the most-requested elements in Treasure Valley outdoor living projects, and for good reason — they extend the usable season of an outdoor space by months and create a focal point that draws people together.
A few design principles that apply universally:
Position the fire feature as an anchor, not an afterthought. The best outdoor fire features are positioned intentionally — typically at the far end of a space from the house, oriented to take advantage of the prevailing wind direction, and placed to become the natural focal point of the surrounding seating area. Fire pits that are dropped into whatever space was left after the kitchen and dining area were planned never quite feel right.
Size the surround appropriately. A fire pit needs adequate pavement around it — both for comfortable seating distance and for safety. A 6-foot circle of pavers around a fire pit is often the minimum for functional use; 8 to 10 feet on the primary seating sides is more comfortable. Designing the paver layout with the seating footprint in mind, rather than just the fire feature footprint, makes a meaningful difference.
Plan for the fuel source early. Gas fire features — by far the most popular in new installations — require a dedicated gas line. That line needs to be run before the base work is complete. Retrofitting a gas line under an installed paver system is expensive and disruptive. If there’s any possibility of a gas fire feature, plan and run the line during construction regardless of whether you’re installing the feature immediately.
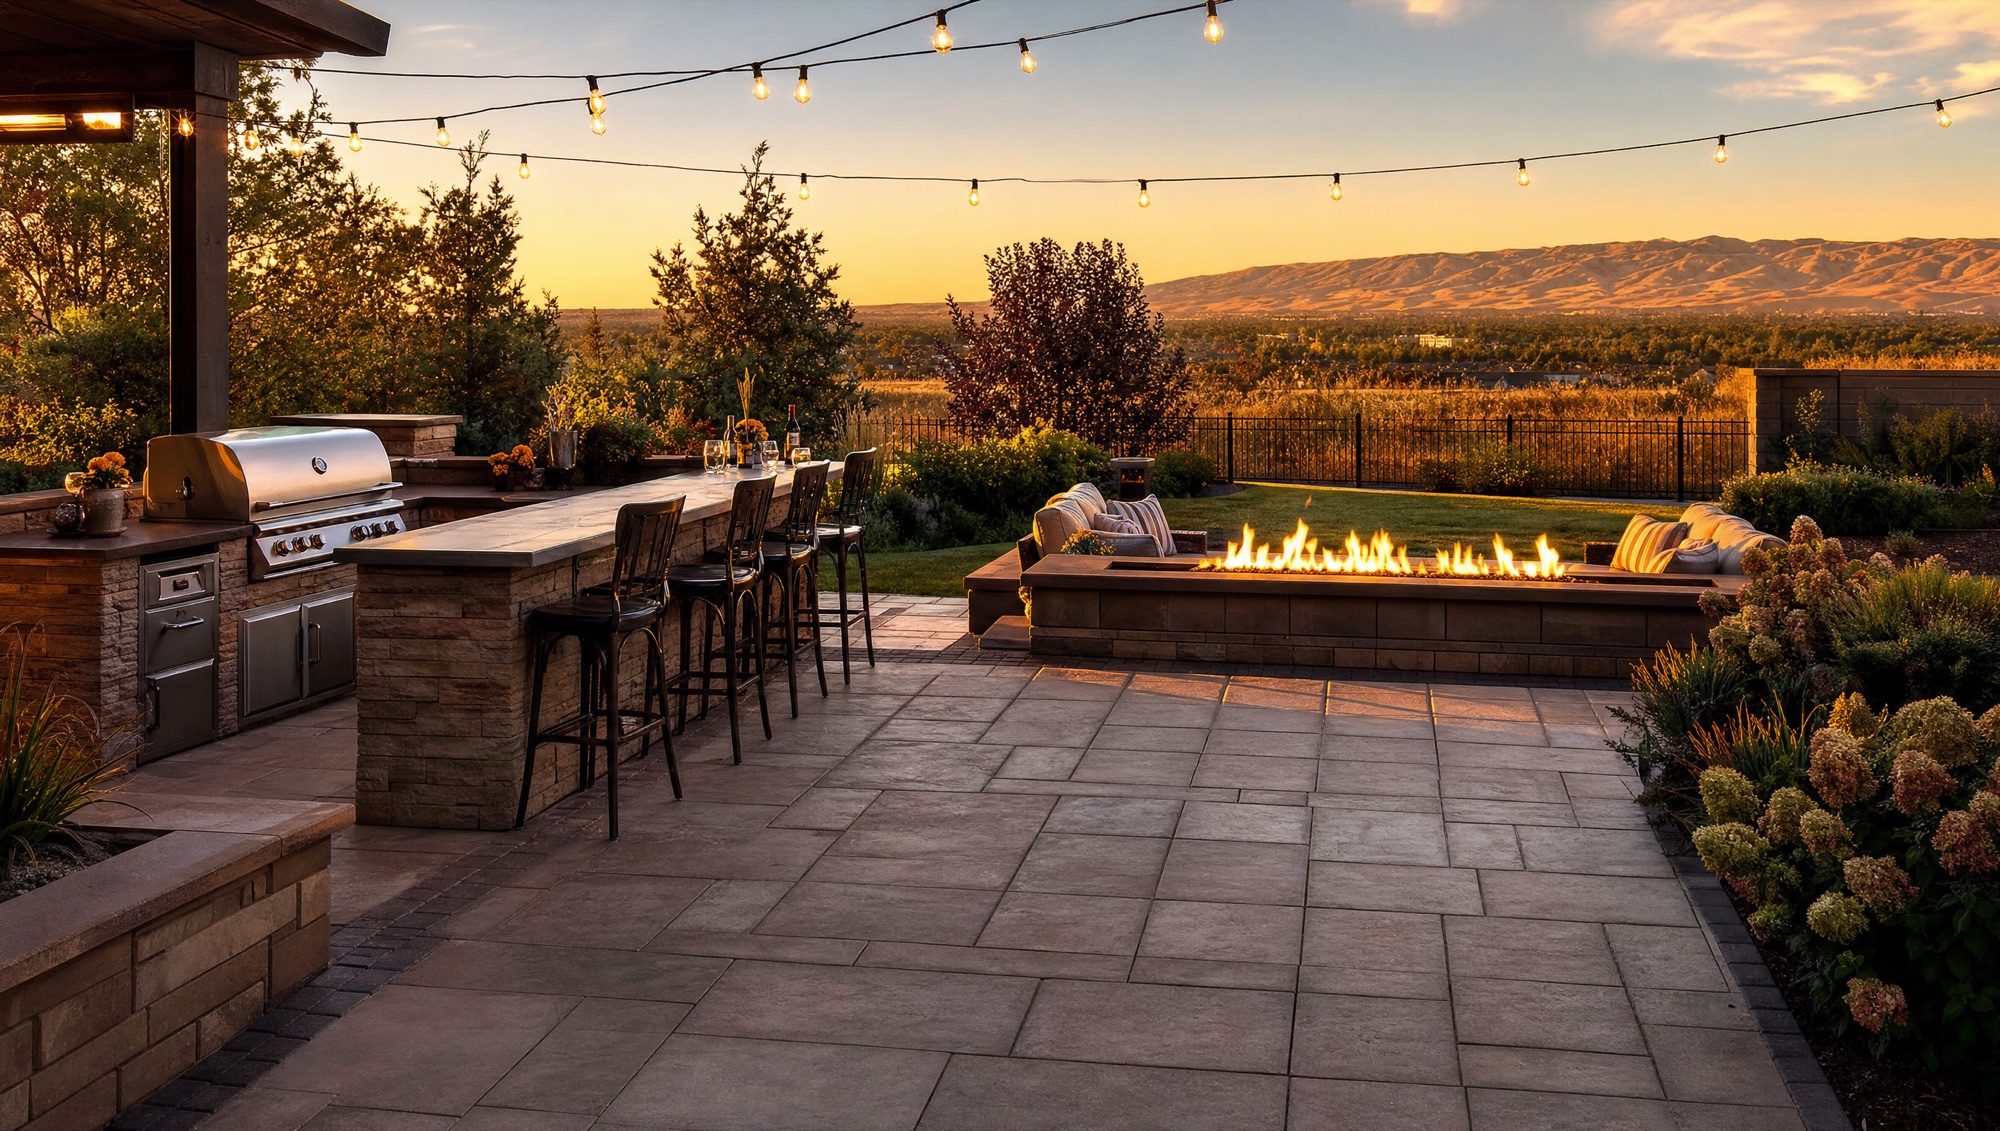
Outdoor Kitchens: What the Hardscape Has to Get Right
An outdoor kitchen is the most infrastructure-intensive element of any outdoor living project. The paver system underneath and around it has to handle more complexity than a standard patio application.
Structural support. Outdoor kitchens — particularly those with natural stone countertops, heavy appliances, or masonry structures — can be heavy. The base beneath an outdoor kitchen needs to be designed with this load in mind. A standard residential patio base specification may not be sufficient under a full kitchen structure with refrigeration, a grill, a sink, and stone countertops.
Utilities integration. Gas, electrical, plumbing, and lighting all need to run to and through the outdoor kitchen. These rough-ins happen during the base installation phase — conduit is set in the base before the pavers go down. The design needs to know where every utility connection is, and those runs need to be planned and executed before any paving begins. This is a critical coordination point that affects both the paver layout and the kitchen design simultaneously.
Working surface and approach. The paver area immediately around the outdoor kitchen — the “working triangle” between the grill, the prep area, and the refrigeration/storage — needs to be functional. This means enough space for a cook to work, for guests to approach without crowding the cooking area, and for service toward the dining zone without awkward cross-traffic.
The Phased Approach (And How to Do It Right)
Most homeowners don’t complete a full outdoor living environment in one phase. That’s completely reasonable — and it’s possible to do it in phases without ending up with the disconnected result described at the start of this piece. The key is designing the full vision upfront and building to it.
If you know you want a fire pit in phase two and an outdoor kitchen in phase three, those locations should be decided now. Conduit and gas lines should be stubbed out during phase one. The paver layout should accommodate the future features without requiring major demolition when you get there.
Building in phases without a full design is how you end up redoing work. Building in phases with a clear plan is how you end up with a finished space that looks and functions like it was always meant to be there.
Ready to Get It Done Right?
Nostalgic Paver Systems has been building premium hardscape across Boise and the Treasure Valley for over 20 years. Whether you’re planning a full outdoor living build in one phase or thinking through a multi-year vision, we can help you design it the right way from the start — so that every piece you add fits.
Every project we build is backed by a workmanship warranty and our unconditional commitment to standing behind the work.
→ Book a Project Discovery Call today.
Frequently Asked Questions
Can you integrate a fire pit and outdoor kitchen into an existing paver patio? Sometimes — it depends on what was built in the original installation. If gas lines and electrical conduit weren’t stubbed out, adding a gas fire feature or fully wired outdoor kitchen requires excavating through the existing paver system to run utilities, then reinstalling. It’s doable but meaningfully more expensive than planning for it during the original build. This is the main reason we encourage clients to plan the full vision even if they’re only building part of it in phase one.
How close to the house can a fire pit be? The general guideline is a minimum of 10 feet from any structure, overhang, or combustible material. Gas fire pits have specific clearance requirements that vary by manufacturer and by local code; wood-burning fire pits are typically held to stricter distances. Your jurisdiction may have additional requirements. We evaluate site-specific clearances as part of the design process.
What type of pavers work best around fire features? Concrete pavers perform well around both gas and wood fire features. Natural stone is also commonly used and can provide a more organic aesthetic. The key consideration is not the paver material itself (quality concrete pavers are heat-tolerant for the distances typically used in fire feature surrounds) but the color — very light pavers will develop heat-related discoloration more visibly than medium or darker tones over time.
Do outdoor kitchens need a permit in Boise? In most cases, yes — particularly when the kitchen involves gas connections, electrical work, or plumbing. Building permits for outdoor kitchens fall under both the building and mechanical departments, and inspections are typically required. This is another reason to plan the kitchen into your project from the beginning — the permitting timeline affects the construction schedule.
What’s the best layout for an outdoor kitchen relative to the house? Proximity to the interior kitchen simplifies food prep and reduces the back-and-forth that makes outdoor cooking feel like work. Beyond that, orientation matters: position the grill so that the cook’s back isn’t to the party, prevailing winds don’t push smoke toward the seating area, and the kitchen is visible from the primary living and dining zones without being the first thing people walk into when they come outside. A slight offset from the house, connected by a clear path, typically works better than a kitchen pressed directly against the exterior wall.
How long does a full outdoor living project take to design and build? For a comprehensive project — paver system, fire feature, and outdoor kitchen — plan for a design and proposal phase of 2 to 4 weeks, a pre-construction phase of 4 to 8 weeks (accounting for permits and material lead times), and a construction phase of 2 to 4 weeks depending on scope. Starting the conversation in early spring typically allows for summer completion. Projects that begin planning in summer often push into fall build windows.
Nostalgic Paver Systems · Boise, Idaho · Serving the Greater Treasure Valley · nostalgicpavers.com
Nostalgic Paver Systems
Planning a project of your own?
Let’s talk through your space, your timeline, and what it would take to build it right the first time.
Book a Project Discovery Call